When trying to play Hytale multiplayer, you may run into problems like these and be unable to play with friends.
Failed to connect to any available address. The host may be offline or behind a strict firewall.- Players with IPv6 can join, but IPv4-only players cannot
- Players with IPv4 can join, but IPv6-only players cannot
There are several ways to solve this, but the simple approach is to use a virtual LAN tool such as Hamachi or Tailscale and make everyone appear to be on the same LAN.
This article uses Hamachi, which is probably the most common tool for this in Japan.
I will cover both client-hosted multiplayer and Dedicated Server setups.
Table of Contents
Open Table of Contents
Ways to Play Multiplayer
- Quick and easy: Client host (Share Code) × Hamachi
- Recommended: Dedicated Server × Hamachi
| Method | Pros | Where people get stuck |
|---|---|---|
| Client host (Share Code) | Works entirely inside the game client. You can play multiplayer without knowing how to run a server. | Multiplayer is only available while the host has the game running |
| Dedicated Server | The connection destination can stay fixed. You can keep a server running even without the host playing. | Requires a bit of knowledge about Command Prompt and networking |
Steps (Easy): Share Code × Hamachi
1) Prepare Hamachi
- Refer to this guide and create a Hamachi network.
- Make a note of the host’s Hamachi IPv4 address (
25.x.x.x)
2) Recreate the share code after connecting through Hamachi (important)
Open your world as the client host and generate a share code.
Make sure you generate the share code only after connecting to the network you created in the step above.
ESC → Online Play- Turn on
Allow Other Players to Join - Generate and copy the share code
2.5) Decode the share code and check the Candidates
Here is a slightly technical detour. You can skip this section if you want.
A Hytale share code can be restored to the original JSON data by doing Base64 decode → raw DEFLATE (zlib raw) inflate.
A Hamachi virtual LAN has an IPv4 address in the 25.x.x.x range and one IPv6 address.
About the Hamachi Virtual IP Address
IPv4 (IP) address in the 25.x.x.x range and one IPv6 address
In other words, if your Hamachi IPv4 / IPv6 address is included in the decoded data’s Candidates, you can check in advance whether you successfully created a Hamachi-aware share code.
Here is an example where the decoded data includes the Hamachi IPv4 address.
{
  "HostName": "DEVKEY",
  "HostUuid": "11111111-2222-3333-4444-555555555555",
  "ServerName": "DEVKEY Server",
  "ExpiresAt": "2026-01-19T09:58:00.592899Z",
  "Candidates": [
    {
      "Type": "Host",
      "Address": "169.xxx.xx.xxx",
      "Port": 55735,
      "Priority": 1000
    },
    {
      "Type": "Host",
      // If this 25.x.x.x address is included in Candidates, the share code was created correctly through Hamachi.
      "Address": "25.xx.x.xxx",
      "Port": 55735,
      "Priority": 1000
    },
    {
      "Type": "ServerReflexive",
      "Address": "138.xx.xx.x",
      "Port": 55735,
      "Priority": 700
    },
    {
      "Type": "ServerReflexive",
      "Address": "2405:xxxx:xxxx:xxxx:xxxx:xxxx:xxxx:xxxx",
      "Port": 55735,
      "Priority": 700
    }
  ]
}
I made a small tool below so you can paste a share code, decode it, and check it like the example above.
The share code pasted here is decoded locally in your browser. It is not sent outside.
Steps (Recommended): Dedicated Server × Hamachi
1) Prepare Hamachi
- Refer to this guide and create a Hamachi network.
- Make a note of the host’s Hamachi IPv4 address (
25.x.x.x)
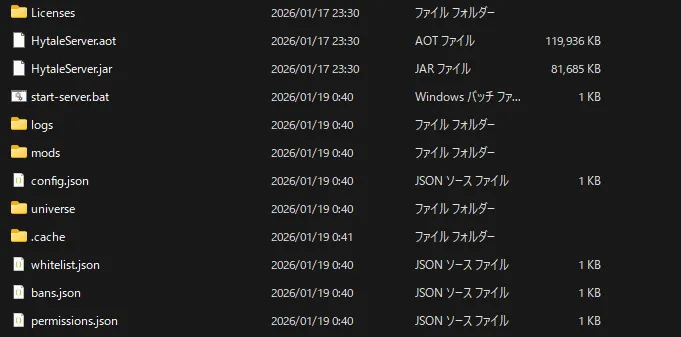
2) Move to the Server directory inside your Hytale directory
The install folder differs for everyone, so look for it from the launcher or elsewhere.
Example: C:\Hytale\install\release\package\game\latest\Server
3) Create a startup BAT file (recommended)
You can type the startup command into Command Prompt every time, but that is annoying, so turning the command into a BAT file makes startup easier.
Place start-server.bat next to HytaleServer.jar.
This is an example. Replace it with your own Hytale install folder.
C:\Hytale\install\release\package\game\latest\
  Assets.zip
  Server\
    HytaleServer.jar
start-server.bat- It is better to use the JRE bundled with the Hytale install folder.
- Specify
Hytale\install\release\package\jre\latest\bin\java.exeinside the Hytale install folder, either as a full path or relative path
- Specify
- Set the IP address to the IPv4 address assigned by Hamachi (
25.x.x.x). - Use Dedicated Server’s default port, 5520.
- You need to allow UDP 5520 in Windows Firewall, but I think Hytale automatically adds the firewall rule when it is installed.
- Specify
Assets.zipfrom the Hytale install folder, either as a full path or relative path
@echo off
setlocal

REM Update this path to match your Hytale install folder location
set JAVA="C:\Hytale\install\release\package\jre\latest\bin\java.exe"

REM Replace this with your Hamachi IP
set BIND_IP=25.xx.xx.xxx
set PORT=5520

REM Specify the path to the bundled Assets.zip
REM This example assumes Assets.zip is one level above the Server directory
set ASSETS=..\Assets.zip

cd /d "%~dp0"

%JAVA% -jar ".\HytaleServer.jar" --assets "%ASSETS%" --bind %BIND_IP%:%PORT%

pause
4) Migrate server data (optional)
If you want to migrate the world data you were playing with a client host into the Dedicated Server, copy over the world data.
Under Hytale/UserData/Saves/, there should be a directory with the name of the world you want to copy.
Copy everything inside it, such as universe, into the Server directory.
5) Start it once
Double-click start-server.bat to start the server.
6) Authenticate
When you start a Dedicated Server for the first time, it will say that there are no server tokens, like this.
[2026/01/18 15:41:00 WARN] [HytaleServer] No server tokens configured. Use /auth login to authenticate.Run the following command in the console, which is the cmd window you started.
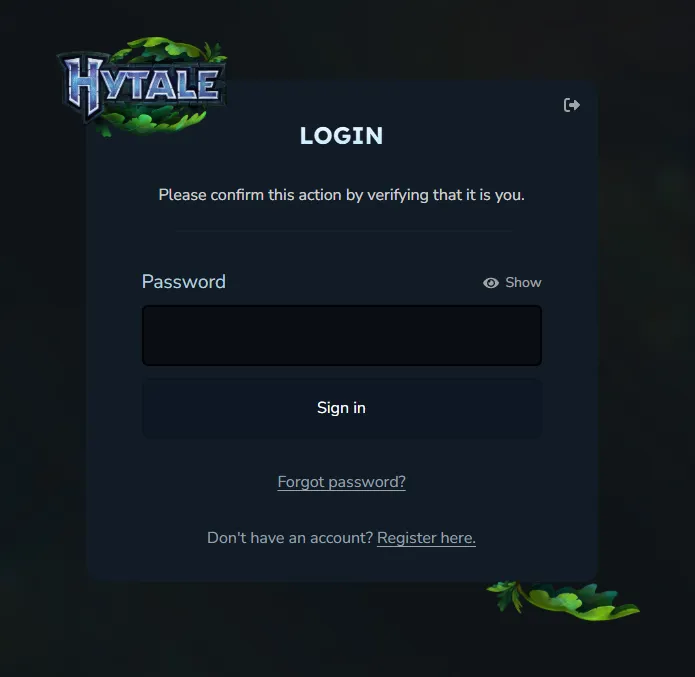
/auth login deviceThen device authentication (OAuth device flow) starts, and a URL and code are displayed.
/auth login device
[2026/01/18 15:41:32   INFO]                 [CommandManager] Console executed command: auth login device
?1h> Starting OAuth2 device flow. Check console for verification URL.
[2026/01/18 15:41:32   INFO]                [AbstractCommand] ===================================================================
[2026/01/18 15:41:32   INFO]                [AbstractCommand] DEVICE AUTHORIZATION
[2026/01/18 15:41:32   INFO]                [AbstractCommand] ===================================================================
[2026/01/18 15:41:32   INFO]                [AbstractCommand] Visit: https://oauth.accounts.hytale.com/oauth2/device/verify
[2026/01/18 15:41:32   INFO]                [AbstractCommand] Enter code: KxXxKKxx
[2026/01/18 15:41:32   INFO]                [AbstractCommand] Or visit: https://oauth.accounts.hytale.com/oauth2/device/verify?user_code=KxXxKKxx
[2026/01/18 15:41:32   INFO]                [AbstractCommand] ===================================================================
[2026/01/18 15:41:32   INFO]                [AbstractCommand] Waiting for authorization (expires in 599 seconds)...
Open the URL after Or visit:, log in from the browser, and approve it.
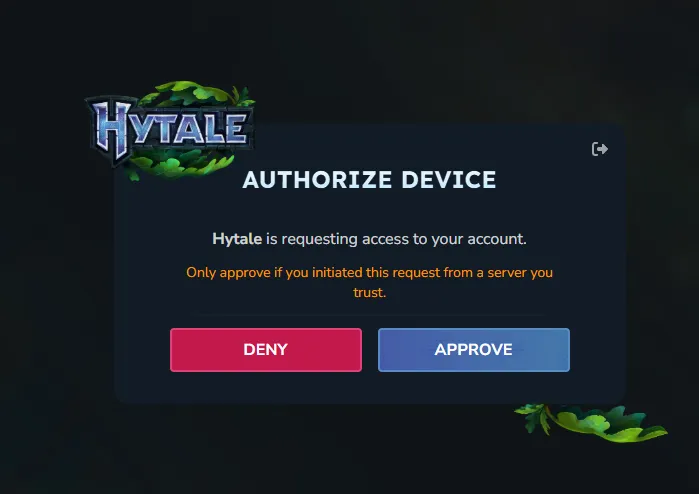
Once approved, the console proceeds like this, and eventually shows Authentication successful.
[2026/01/18 15:43:03 INFO] [SessionServiceClient] Session Service client initialized for: https://sessions.hytale.com
[2026/01/18 15:43:03 INFO] [SessionServiceClient] Fetching game profiles...
[2026/01/18 15:43:04 INFO] [SessionServiceClient] Found 1 game profile(s)
[2026/01/18 15:43:04 INFO] [ServerAuthManager] Auto-selected profile: Test (xxxxxxxxxxxxxxxxxxxxxxx)
[2026/01/18 15:43:04 INFO] [SessionServiceClient] Creating game session...
[2026/01/18 15:43:04 INFO] [SessionServiceClient] Successfully created game session
[2026/01/18 15:43:04 INFO] [ServerAuthManager] Token refresh scheduled in 3297 seconds
[2026/01/18 15:43:04 INFO] [ServerAuthManager] Authentication successful! Mode: OAUTH_DEVICE
Authentication successful! Use '/auth status' to view details.
WARNING: Credentials stored in memory only - they will be lost on restart!
To persist credentials, run: /auth persistence <type>
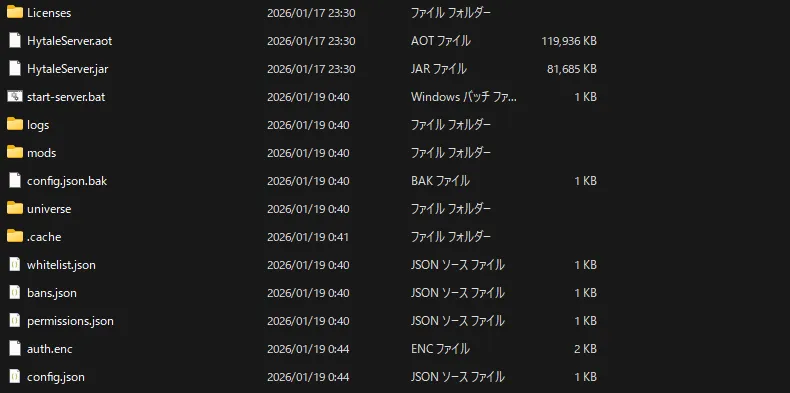
Available types: Memory, Encrypted7) Persist authentication (recommended)
As-is, the credentials are only stored in memory, so every time you restart the server, you will have to run auth login device again.
Unless you have a reason to be strict about security, such as managing a large server with multiple admins, doing this every time is honestly a pain, so make sure to persist it. (If you are using Hamachi, it is probably already a private server for people you know.)
/auth persistence EncryptedIf you see a log like this, you are good.
/auth persistence Encrypted
[2026/01/18 15:44:21   INFO]                 [CommandManager] Console executed command: auth persistence Encrypted
> [2026/01/18 15:44:21   INFO]              [ServerAuthManager] Swapped credential store to: EncryptedAuthCredentialStoreProvider
Credential storage changed to: Encrypted
You can also check with the following command just to be safe.
/auth statusIf you see a log like this, it is OK.
Session Token: Present
Identity Token: Present
Expiry: 00:58:26 remaining
8) Play!
Double-click start-server.bat to start it.
You and the other participants can join by adding a Hytale server at Hamachi IP address:5520.
Example: 25.111.222.xxx:5520
9) Shut down the server cleanly
When you want to close the server, press Ctrl + C in the cmd window to stop it.
If you close it by pressing the X button, the process may remain, or the server data may not be saved correctly before shutdown.
After pressing Ctrl + C, wait until logs like these appear.
[2026/01/19 14:47:00   INFO]                 [PluginManager] Shut down plugin Hytale:ServerManager
[2026/01/19 14:47:00   INFO]                 [PluginManager] Shut down plugin Hytale:WorldLocationCondition
[2026/01/19 14:47:00   INFO]          [SessionServiceClient] Terminating game session...
[2026/01/19 14:47:00   INFO]          [SessionServiceClient] Game session terminated
[2026/01/19 14:47:00   INFO]                  [HytaleServer] Saving config...
[2026/01/19 14:47:00   INFO]                  [HytaleServer] Shutdown completed!
[2026/01/19 14:47:03 SEVERE]                  [HytaleServer] Forcing shutdown!
Terminate batch job (Y/N)?
Once you get this far, you can type y and press Enter, or just close the cmd window with the X button.